
Introduction
You see embroidered logos everywhere—on baseball caps, corporate polos, and branded jackets. They look clean, professional, and seamlessly stitched. It’s easy to assume you can just send a JPEG to an embroidery machine and get that result. But if you’ve ever tried that, you know the outcome is usually a tangled, puckered mess. The critical, behind-the-scenes process that makes the magic happen is called digitizing embroidery. This isn’t a simple file conversion; it’s a sophisticated craft that blends technical skill with artistic vision. It’s the essential translation service between a digital image and a physical embroidery machine, and it’s the single biggest factor between an amateur-looking stitchout and a flawless professional finish. Let’s pull back the curtain on this fascinating process and explore the art behind every single stitch.
It’s Not Printing: Why Embroidery Needs a Different Language
To understand digitizing, you first must understand why you can’t just “print” a design onto fabric with thread.
A standard image file, like a JPEG or PNG, is a raster image. It’s made of a grid of tiny colored squares called pixels. Your computer screen displays these pixels to create a picture.
An embroidery machine is not a printer. It’s a sophisticated mechanical device that needs a set of commands to physically move its needle and thread. It needs to know:
- Where to move next (the X and Y coordinates).
- What type of stitch to make when it gets there.
- When to trim the thread and change colors.
A pixel-based image gives it none of this information. This is where the digitizer comes in. They act as a translator, interpreting the visual image and creating a brand new set of instructions—a digital blueprint—that the machine can execute.
So, What Exactly Is Digitizing Embroidery?
Digitizing embroidery is the process of manually converting artwork into a digital file containing specific commands that an embroidery machine can read to recreate the design in thread.
Think of it like this:
- Your logo is a picture of a house.
- The digitizer is the architect who draws up the detailed blueprints.
- The embroidery machine is the construction crew that follows the blueprints.
- The stitched design is the finished house.
Without the architect’s blueprints, the construction crew wouldn’t know where to put the walls or the windows. Similarly, without a digitized file, an embroidery machine has no idea what to do.
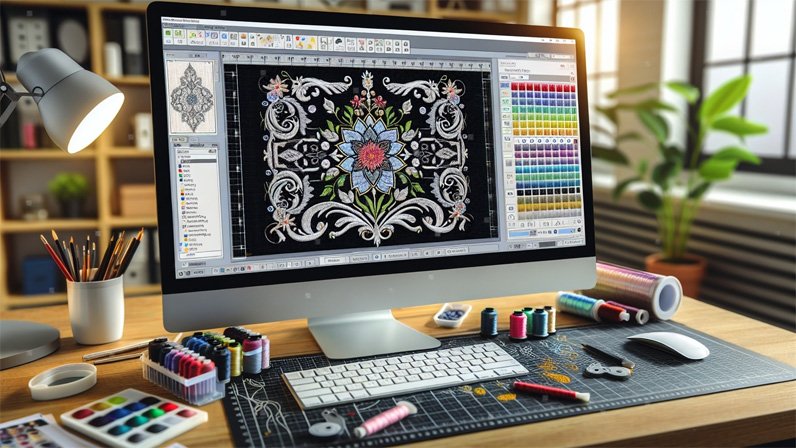
The Digitizer’s Toolkit: It’s More Than Software
While digitizers use specialized software (like Wilcom or Hatch), the real tools are their knowledge and skill. For every element of a design, they make a series of critical decisions.
1. Stitch Type Selection
The digitizer chooses the best type of stitch to represent each part of the design. The three main types are:
- Run Stitch: A single line of stitching, perfect for fine details, outlining, and creating a hand-drawn look.
- Satin Stitch: A series of zig-zag stitches that lie side-by-side, creating a smooth, shiny, and rope-like effect. This is ideal for text and borders.
- Fill Stitch: A pattern of running stitches (often a zig-zag or tatami pattern) that covers a large area like a background. The digitizer can adjust the angle and density of these stitches to create different textures.
2. Mapping the Stitch Path
The order in which the machine sews the design is crucial. The digitizer must sequence the elements logically to:
- Minimize the number of times the machine needs to trim the thread (jumps).
- Prevent the needle from sewing through existing stitches, which can cause breaks or snags.
- Ensure that lighter colors are stitched before darker ones to avoid visible shadowing.
3. Underlay: The Secret Foundation
This is the most important step that amateurs miss. Underlay is a series of stitches sewn first but hidden beneath the top stitches. It serves several vital functions:
- Stabilizes the Fabric: It anchors the design to the fabric, preventing shifting and puckering.
- Creates a Level Base: It pushes down the nap of towels or fleece, ensuring smooth coverage on top.
- Defines Edges: It provides a firm foundation for satin stitches to push against, creating a sharper, more defined edge.
4. Pull Compensation
Thread naturally pulls on the fabric as it stitches, which can cause small gaps to appear between different sections. Digitizers use pull compensation to intentionally oversize elements slightly. When the thread pulls and contracts, the elements settle into their perfect position with no gaps.
5. Density Settings
The digitizer must set how closely packed the stitches are. Too dense, and the design becomes stiff and can cause fabric puckering. Too sparse, and the fabric shows through, making the design look cheap and unfinished. The ideal density changes based on the type of fabric being used.
The Difference Between Digitizing and Auto-Digitizing
Many software programs have an “auto-digitize” button. This feature automatically traces an image and assigns stitches. While it seems like a quick fix, the results are almost always poor.
- Auto-Digitizing is like using Google Translate for a complex poem. It gets the basic words right but misses the nuance, rhythm, and artistry. It doesn’t understand fabric, pull compensation, or strategic stitch paths.
- Manual Digitizing is done by a human artist. It’s like a professional literary translator who captures the true meaning, emotion, and beauty of the original work. They apply craftsmanship and foresight to ensure the design not only looks good but also stitches efficiently.
Why Professional Digitizing is Non-Negotiable for Quality
You can have the most expensive embroidery machine in the world, but if you feed it a poorly digitized file, it will produce a poor-quality product. The digitized file is the brain of the operation; the machine is just the muscle.
Investing in professional digitizing services ensures:
- Flawless Stitchouts: The design runs smoothly from start to finish without thread breaks or puckering.
- Time and Material Savings: You avoid wasting hours troubleshooting and scrapping ruined garments.
- Brand Integrity: Your logo looks crisp, professional, and consistent on every single item, protecting your brand’s image.
Conclusion: The Unseen Artistry in Every Stitch
Digitizing embroidery is far more than a technical process; it is a true art form. It requires a deep understanding of how thread interacts with fabric, a keen eye for visual design, and the patience to plot thousands of tiny commands.
The next time you see an embroidered cap or jacket, take a closer look. Appreciate the sharp edges of the text, the smooth coverage of the fills, and the overall clean appearance. What you’re seeing is not just thread; you’re seeing the invisible hand of a digitizer—the architect of embroidery who translated a idea into a blueprint and brought it to life, one perfect stitch at a time.


